


This is a short tutorial on how to create a VueJS component, and how to export it on npm, so that you can reuse this component in several projects, simply using
npm install --save my-component
Tested Configuration:
vue: 2.6
vue-cli: 3.5.2
npm: 6.4.1
Why this tutorial
There are some tutorials out there to publish a VueJS componenent on npm. But there is always something missing, or skipped, that makes your life hard. Here, I willl try to guide you through every step so that it will work in the end.
- Create your directory
mkdir my-component-directory
cd my-component-directory
- Install vue-cli
We need to install the vue CLI globally (so that commandvueis accessible everywhere in your computer)
npm install -g @vue/cli
- Create your VueJS component
We use the CLI just installed to create our component
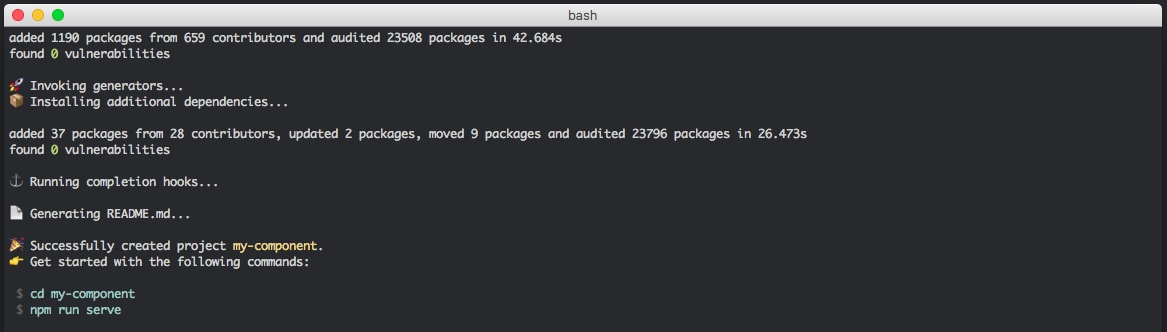
vue create my-component
You will be asked a few questions, go for default choices.

At the end you should see this:
- Get into the folder auto-created by the vue CLI
cd my-component
Here you can open your IDE, atom, sublime text, Visual Studio or any other. You should have this directory structure:

First thing to notice: there is a .git already!
if you type:
git status
you should see
On branch master
nothing to commit, working tree clean
- Understand the main file: package.json
In a npm package (and this is an npm package), the main file is package.json. It is the file that tells the program what to do, with which dependancies, but also the author of the package…
Our package.json should resemble this:
{
  "name": "my-component",
  "version": "0.1.0",
  "private": true,
  "scripts": {
    "serve": "vue-cli-service serve",
    "build": "vue-cli-service build",
    "lint": "vue-cli-service lint"
  },
  "dependencies": {
    "vue": "^2.6.6"
  },
  "devDependencies": {
    "@vue/cli-plugin-babel": "^3.5.0",
    "@vue/cli-plugin-eslint": "^3.5.0",
    "@vue/cli-service": "^3.5.0",
    "babel-eslint": "^10.0.1",
    "eslint": "^5.8.0",
    "eslint-plugin-vue": "^5.0.0",
    "vue-template-compiler": "^2.5.21"
  },
  "eslintConfig": {
    "root": true,
    "env": {
      "node": true
    },
    "extends": [
      "plugin:vue/essential",
      "eslint:recommended"
    ],
    "rules": {},
    "parserOptions": {
      "parser": "babel-eslint"
    }
  },
  "postcss": {
    "plugins": {
      "autoprefixer": {}
    }
  },
  "browserslist": [
    "> 1%",
    "last 2 versions",
    "not ie <= 8"
  ]
}
We will cover many parts later, let’s begin with our development for now.
Note one thing: in "scripts" you an read `
“serve”: “vue-cli-service serve”`. This is going to be used bellow.
- Run our app
Go back to your terminal and type
npm run serve
As you see, npm will get into package.json to know what to do with serve. In our case, this will trigger vue-cli-service serve
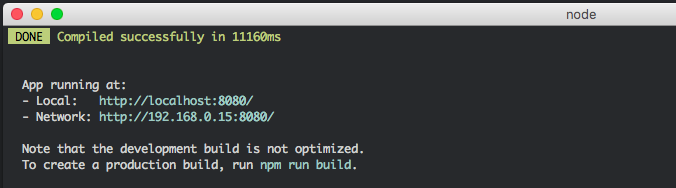
Now go to your browser and reach the adress mentionned above http://localhost:8080/
You should see this:
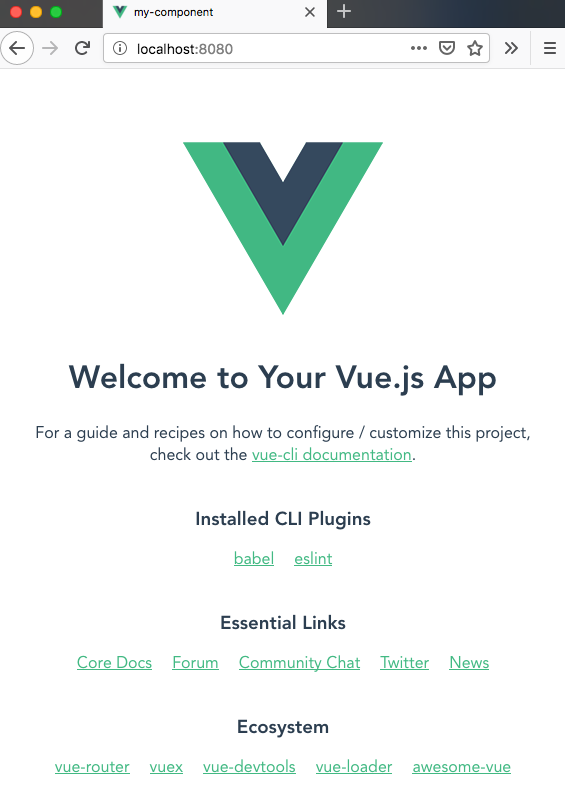
This is our development environment.
- Developp your component
I am not going to talk here about how to create Vue components, etc… There are many tutorials out there about it. And the official documentation is also really good.
Understand one thing: here we will export our HelloWorld.vue component. So every modification you make have to be inside this component. - Build
Now that you are happy with your HelloWorld.vue component, it’s time to build it.
There is one thing to de before we build: customize the build option inside the package.json file. So open package.json and replace the line
"build": "vue-cli-service build",
with this one:
"build": "vue-cli-service build --target lib --name my-component 'src/components/HelloWorld.vue'",
Now you are ready for the build
npm run build
What happens here is the creation (the previous one is deleted) of the /dist folder, where our .vue component is transformed into a simple .js file.
- Prepare before publish
We have to do 2 important things:
First, let’s give it a unique name. my-component is alrady taken. So change it: how do you want to call your package ? Note: to make sure you have a unique name, check it out on name-checker
Second, the entry point: let’s tell npm where to start when our package will be called (after installed) in a bigger project. To do so, add the"main"parameter, which leads npm to the file being called.
Change package.json from
...
"name": "my-component",
...
to:
...
"name": "my-customised-component-name-unique",
"main": "dist/prune-cluster.umd.js",
...
You can add a "description", a "repository" and also change "private": true, into "private": false, if you want to make your package open.
- Publish on npm
Make sure you have an account on npm, or crete one.
Then you can login from your terminal:
npm login
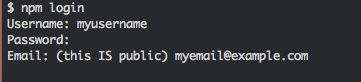
You should see a line saying
Logged in as myusername on https://registry.npmjs.org/.
And finally you can publish your package:
npm publish
Note for later updates fo the package: Make sure you update the “version” number inside package.json before publishing again (to avoid versioning issues)
- Use
From your project you can now install your package:
npm install my-customised-component-name-unique
And use it as any component you import from npm!
Note that you can pass props to your package without any problem.
Ressources:
stackOverFlow 1: No use of Vue-Cli here, that’s unfortunate since this tool makes your life easier. But a good read to understand the process of creating and publishing an npm package
vuejs doc: Prototyping according to the official doc
medium: the closest tutorial to what needed